insights
Staffing Wizard Makes Staffing Analysis Even Easier
There’s a new toy in your ES Optimizer Stocking!
If you’re wanting a great gift for the new year, take a moment to play with the Staffing Wizard function in ES Optimizer. This new tool allows you to create a Staffing Analysis easily without having to enter all the data previously needed for daily policing and project cleaning.
The Staffing Wizard automatically uses your current ES Optimizer cleaning-standard settings for all cleaning elements (Daily and Project) for each frequency group. In addition, simple and clear on-screen language makes the forms easy to understand and complete. Let’s take a look.
When you enter Staffing Analysis from the dashboard of ES Optimizer, you’ll see a screen that looks like this:
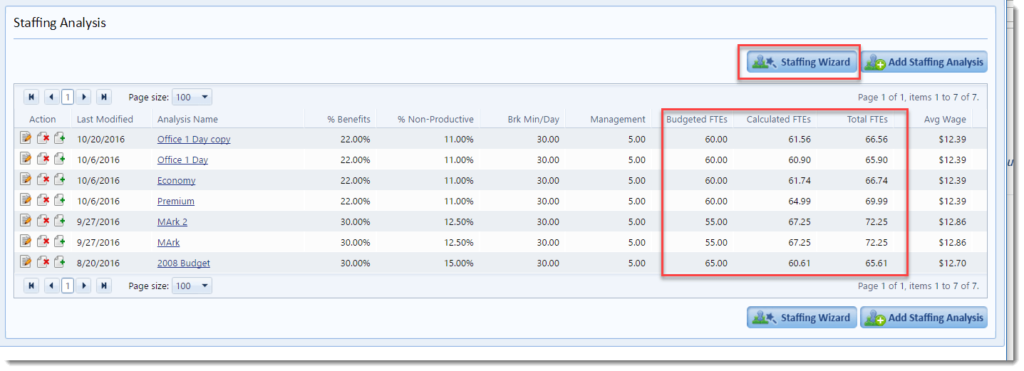
This particular user has saved seven unique staffing analyses. I’ve drawn boxes around two new enhancements on this page: the Staffing Wizard button and a grid of data that shows budgeted, calculated, and total full-time employees (FTEs) for each analysis.
To start a new staffing analysis, click on the Staffing Wizard button. You’ll go to a screen that looks like this:

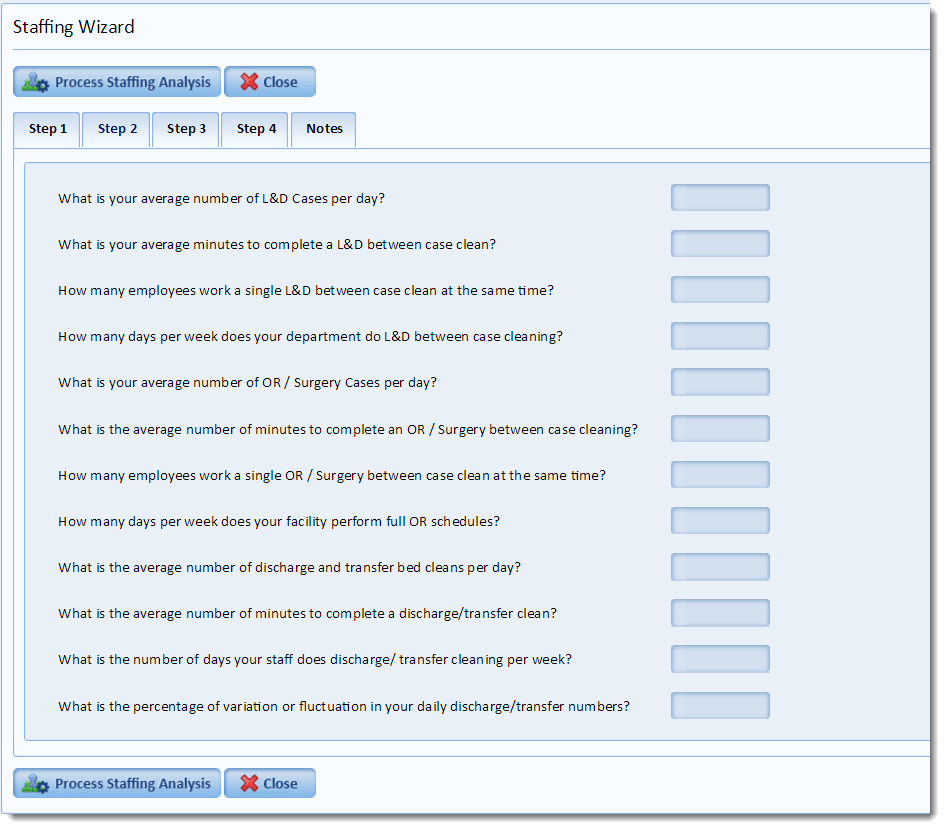
As the tabs indicate, you can create a staffing analysis in four steps. (Step 1 opened by default when you clicked on “Staffing Wizard.”) In this first step, you enter your department information. The “Use Previous Staffing Settings” box lets you automatically populate the fields and edit the data as needed to save time. Once you have completed this page, click on the Step 2 tab. No need to save your data between steps—Staffing Wizard does that for you.
In Step 2, you respond to prompts that assess your staffing requirements for discharges/transfers and between-case cleaning duties. Notice that the text uses common abbreviations and simple language to make entering the data easy.
In Step 3, you note any additional staffing your department uses. Staffing Wizard provides ten predefined selections by default. However, you may customize these to include any staff designations you wish.

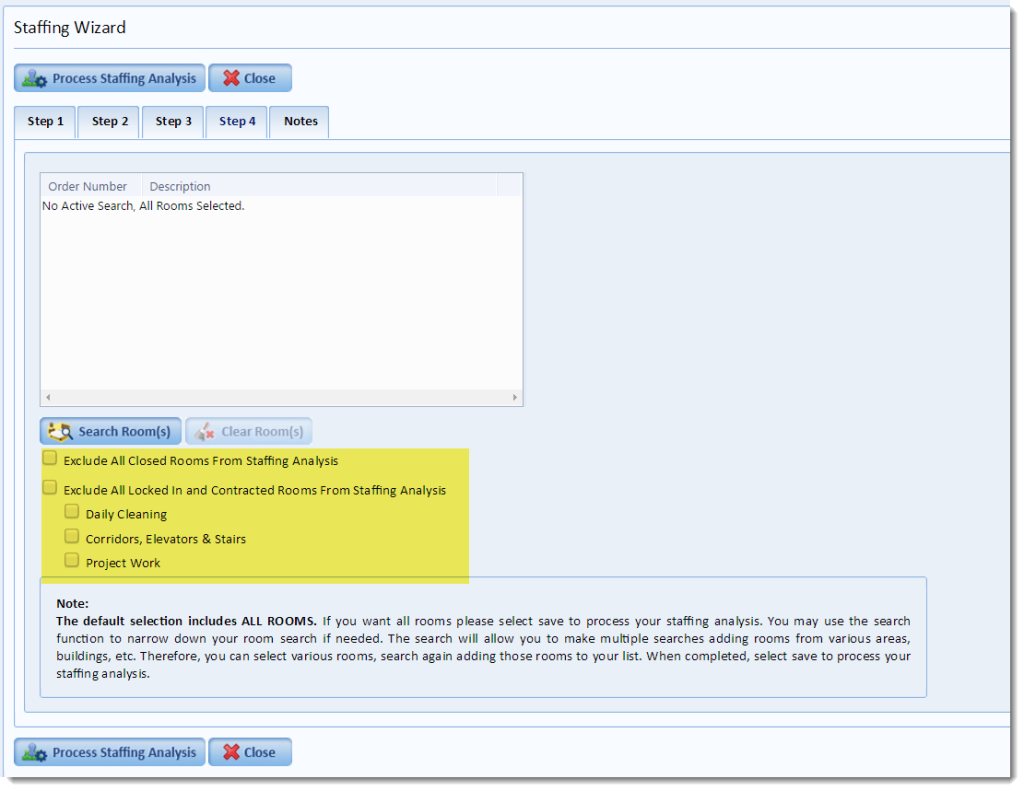
In Step 4, you select the rooms to include in your analysis. You can check an entire facility, a building, or any area you designate. By default, Staffing Wizard will analyze staffing for all rooms. Filters allow you to exclude closed rooms from analysis. You can also exclude all locked-in and contracted rooms, and you may further filter these by “daily cleaning,” “corridors, elevators & stairs,” and “project work.”
The “notes” tab lets you enter important information about your analysis. If you preselected filters, it automatically stores those choices here for your reference.
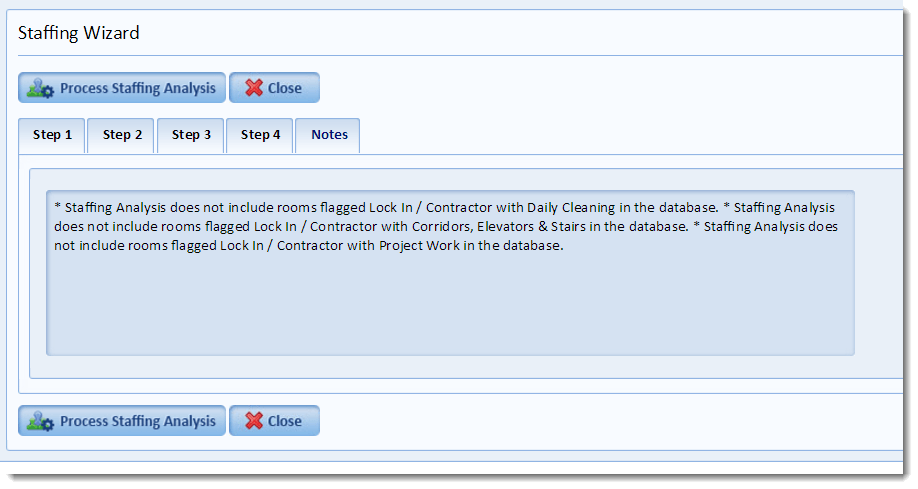
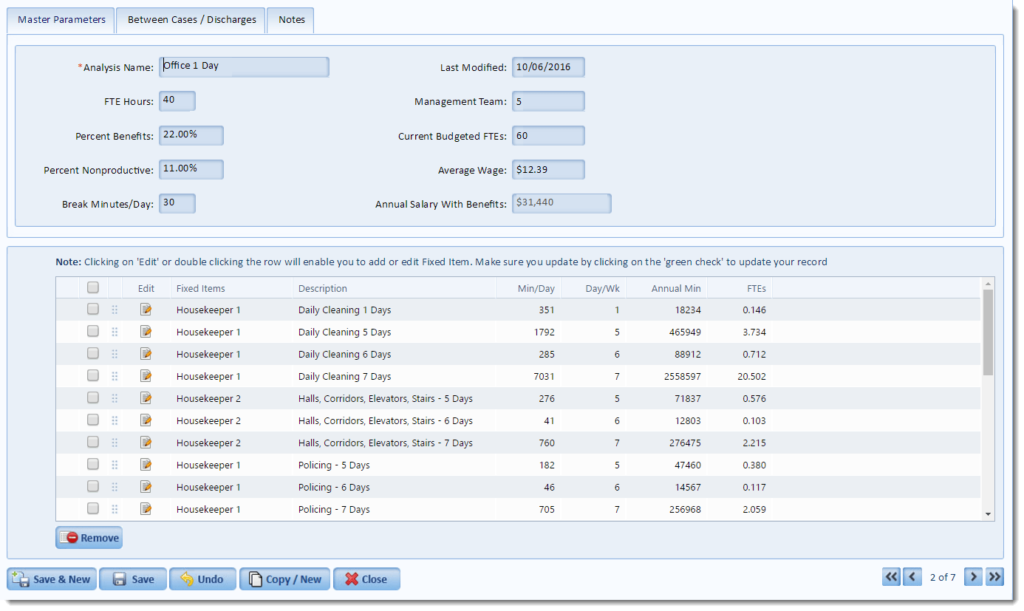
Now, select “Process Staffing Analysis” to instantly generate the report (below). Staffing Wizard makes staffing analysis quick, simple, and easy. It’s a gift that will keep on giving, week after week, all year long. If you’d like to learn what other features ES Optimizer can give to you to simplify your environmental services management call us at 800–260-8665.